


การตั้งค่า VPN Window 8.1
การตั้งค่า VPN Window 8.1

การตั้งค่า VPN Window 8.1
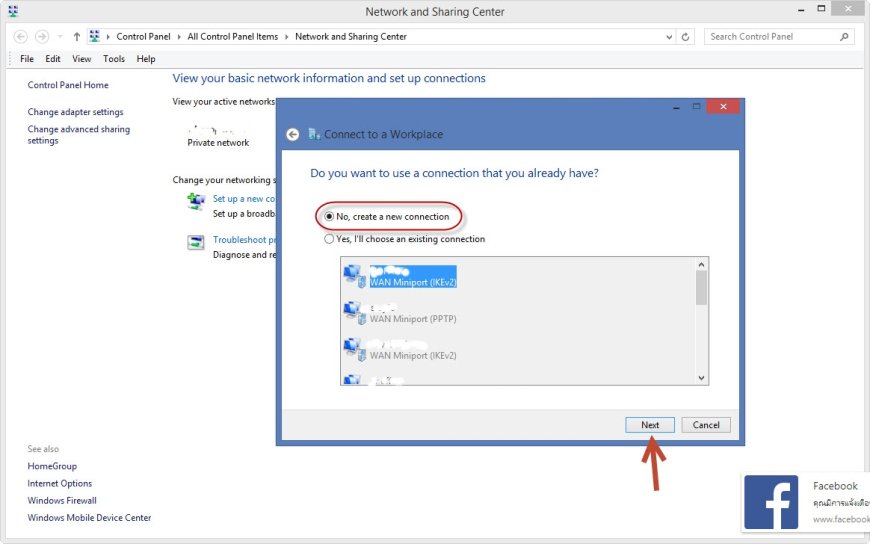
1.คลิกที่ Control Panel > All Control Panel Items > Network and Sharing Center > Setup Up a Connection or Network > Choose a Connection or Network >
เลือก Connect to a workplace > คลิกปุ่ม Next

2.คลิก No, create a new connection > กดปุ่ม Next
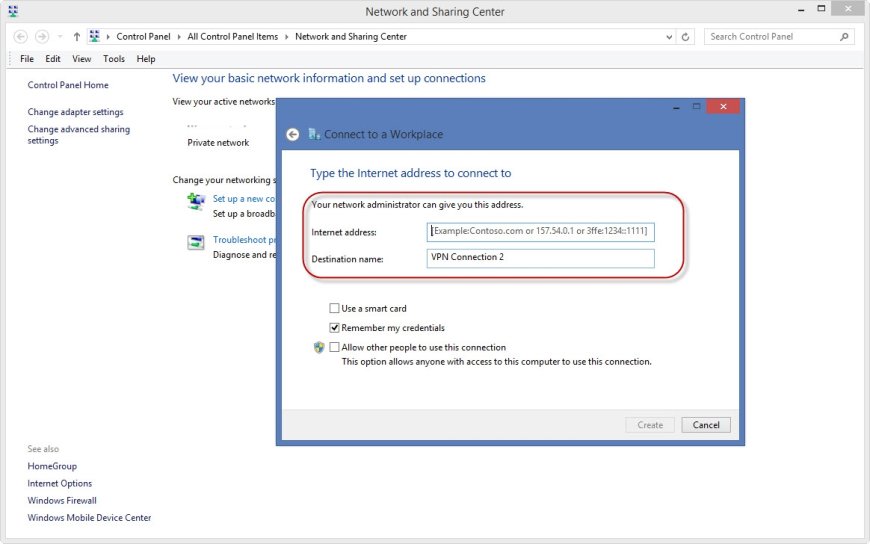
3.พิมพ์ Internet address: public ip address เช่น (113.0.99.55) หรือ dynamic domain name system (ddns: itmuemai.dyndns.com)
Destination name: ชื่อ VPN อะไรก็ได้ คลิกเครื่องหมายถูกหน้า Remember my credentials > กดปุม Create
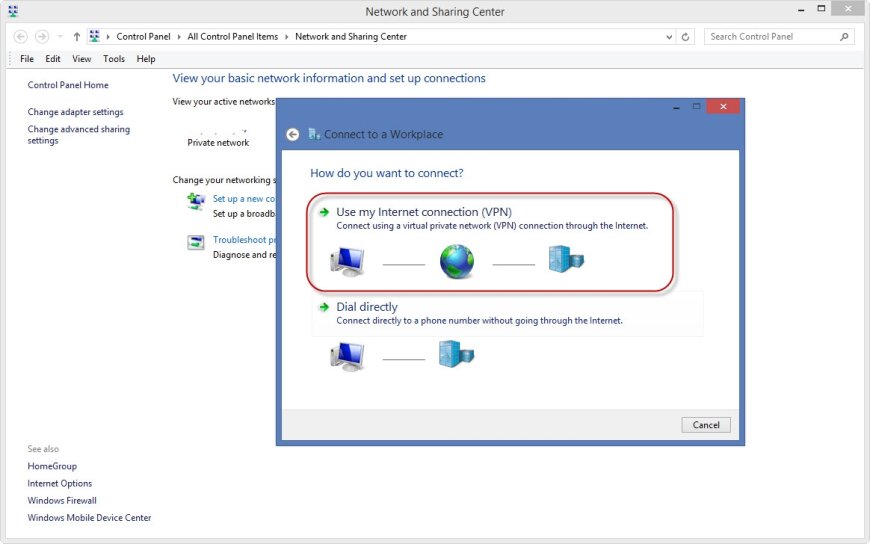
4.เลือก Use my Internet connection (VPN)
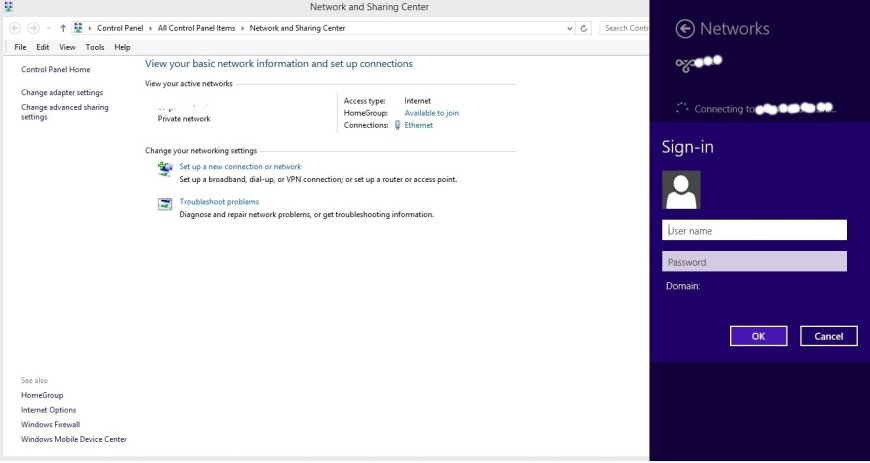
5.ทดสอบการใช้งาน VPN ที่เราสร้างขึ้น
What's Your Reaction?